September 23, 2025
The Ultimate Freelance Client Onboarding Checklist (Free Template)
You got the "Yes!" from a new client. A five-second rush of euphoria hits, immediately followed by a quiet, creeping panic: "Okay... what now?"
A chaotic project start—where contracts are forgotten, access is an afterthought, and key questions aren't asked—is a guarantee of future problems. It sets a messy, unprofessional tone and creates friction down the line.
Professional client onboarding isn't bureaucracy; it's the foundation of a successful project. It’s a simple system that builds instant trust and makes you look like the organized pro you are. We’re giving you the complete, copy-paste checklist to make it effortless.
Why You Need an Onboarding Checklist (It's Not Just Admin Work)
- It Builds Instant Trust: When you guide a new client through a clear, step-by-step process, they feel it. They see you have a system, which makes them relax and trust that their project is in good hands.
- It Prevents Scope Creep: The best time to prevent "scope creep" is before the project even starts. Asking the right questions during discovery clearly defines the boundaries of the engagement.
- It Gathers Everything in One Go: Stop the endless "Oops, I forgot to ask for..." emails. A checklist ensures you get all the logins, assets, and information you need right at the beginning.
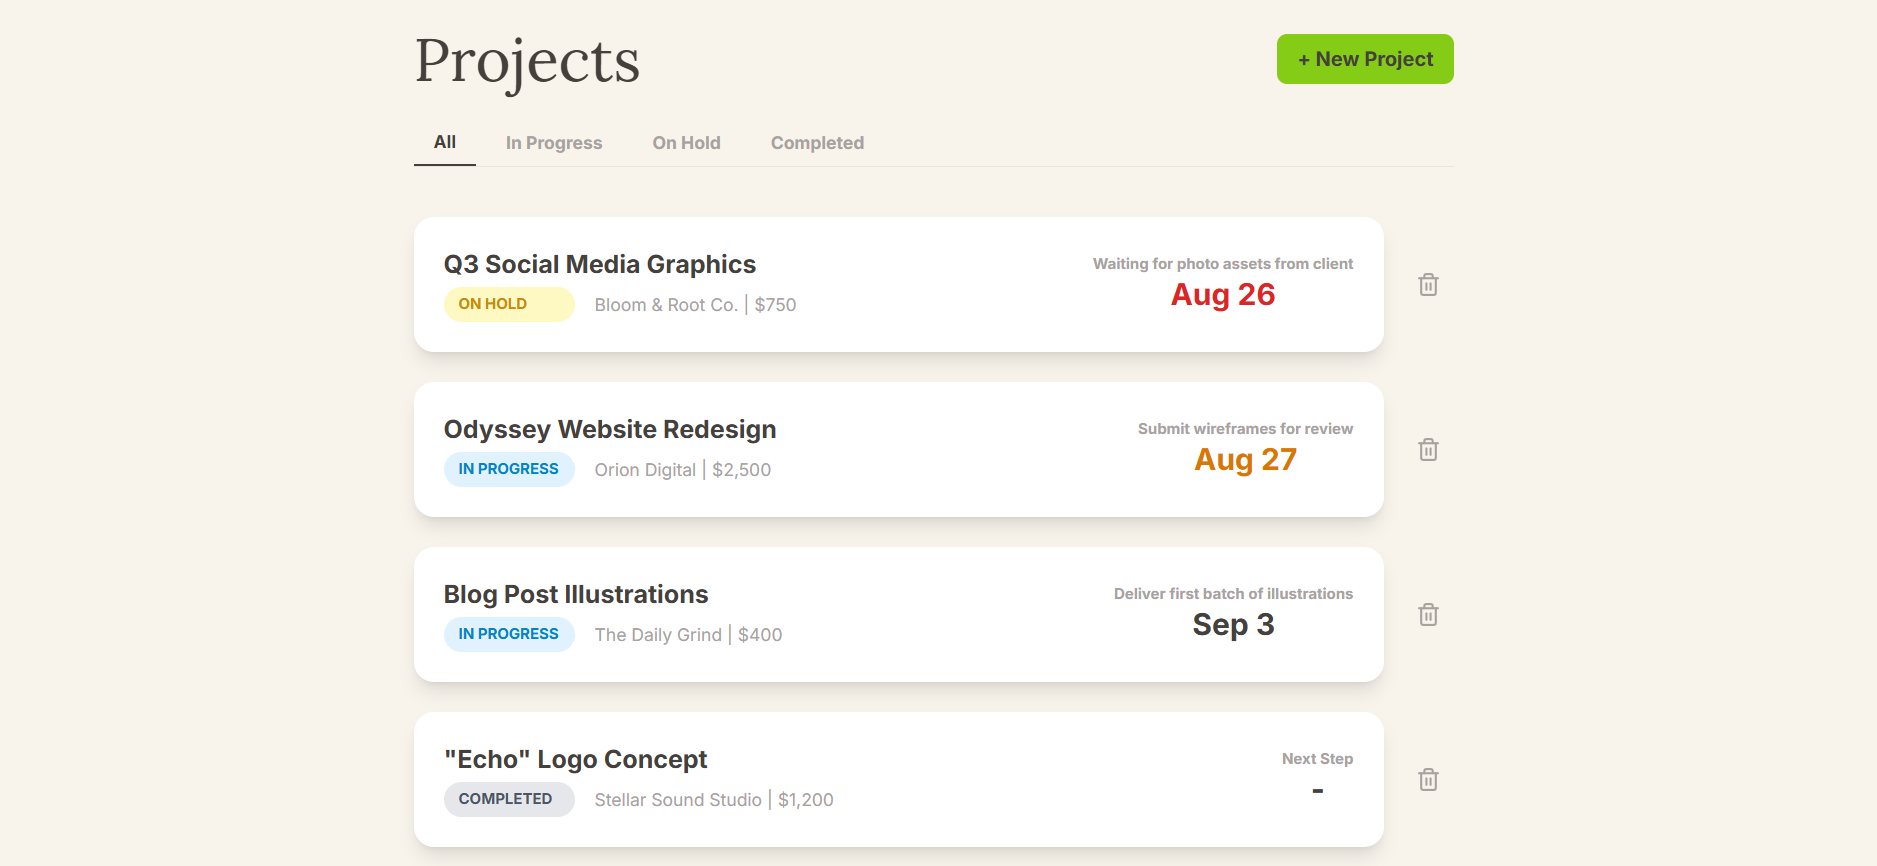
The 4-Phase Client Onboarding Checklist (Your Free Template)
Here is a complete checklist you can copy and adapt for your own freelance business. We’ve broken it down into four logical phases.
Phase 1: Securing the Project (The "Paperwork")
- [ ] Send the contract or service agreement.
- [ ] Receive the signed contract.
- [ ] Send the deposit or kick-off invoice.
- [ ] Confirm payment is received and log it in your invoice tracker.
- [ ] If the client goes silent on the contract, send a professional follow-up.
Phase 2: Gathering Intelligence (The "Discovery")
- [ ] Send your new client a project discovery questionnaire.
- [ ] Receive all necessary logins and access (e.g., CMS, Google Analytics, social media, code repositories).
- [ ] Gather all brand materials (e.g., logos, fonts, style guides, existing assets).
Phase 3: Setting Expectations (The "Kick-off")
- [ ] Schedule and conduct the official project kick-off call.
- [ ] Establish and agree on the primary communication channel (e.g., Slack, Email).
- [ ] Set clear expectations for response times (for both you and the client).
- [ ] Explain that the client will receive a concise weekly progress report. (This single step will eliminate 90% of client anxiety).
Phase 4: Internal Setup (The "Go")
- [ ] Set up your internal project folder (e.g., Google Drive, Dropbox).
- [ ] Create the new project in Jornl and set the first major deadline on your dashboard.
- [ ] Copy this entire checklist into your Jornl project log to track completion and add notes.
A Template is a List. A System is How You Use It.
A checklist in a static Google Doc is fine. But it’s "dead"—disconnected from the project itself. The real magic happens when you turn that list into a living process.
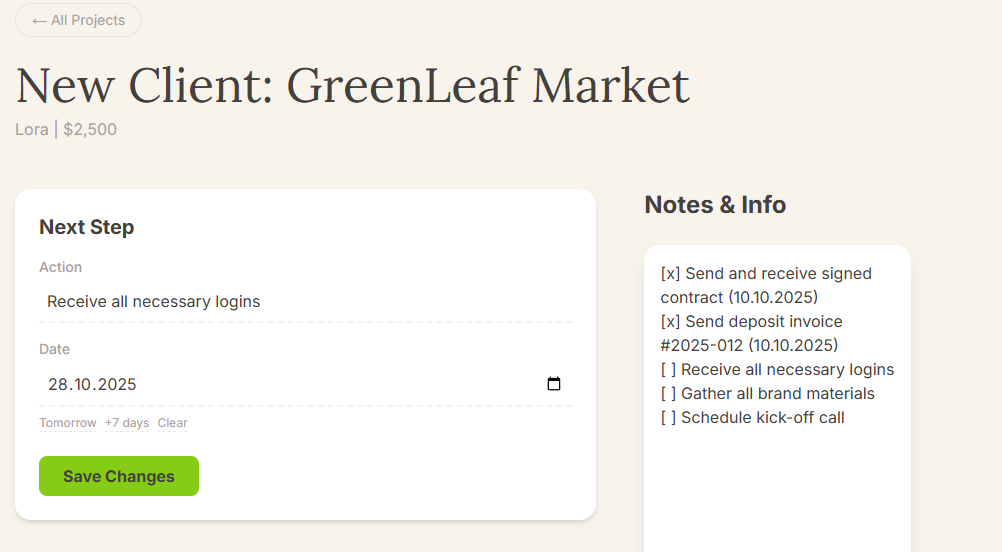
Here’s how to do it: When you start a new project in Jornl, you copy this checklist directly into that project's "Captain's Log" (its journal). As you complete each step, you can add notes (Contract signed 10.10, All access received 10.11).
The entire onboarding process is now documented inside the project it belongs to. This isn't just a list; it's the first chapter of your project's story. That is how you calmly manage your projects.
Conclusion
A project's success is often decided in the first 48 hours. A smooth, professional onboarding process is your single best tool for building client trust and ensuring a friction-free project from day one.
Don't just download a checklist. Implement a system. Start your next project in Jornl and turn this list from a static document into a powerful, living workflow.